Nuxt.js+Vuetifyで、アカウント登録画面を実装しました。
フロントで最低限の入力チェックが通ったら、送信ボタンを押せるようにして、無駄なAPIリクエスト減らす。APIからの入力エラーもvee-validateを使用して、各項目に表示するようにしました。
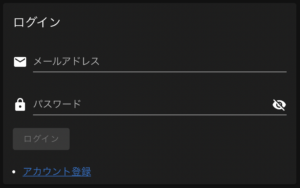
合わせて、前回実装したログイン画面にも導入しました。
→ Nuxt.jsとRailsアプリのDevise Token Authを連携させて認証する
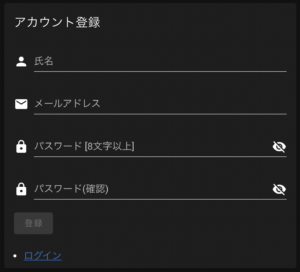
初期表示
フロントの入力エラー

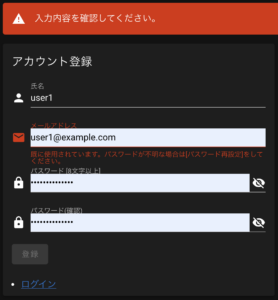
APIからの入力エラー
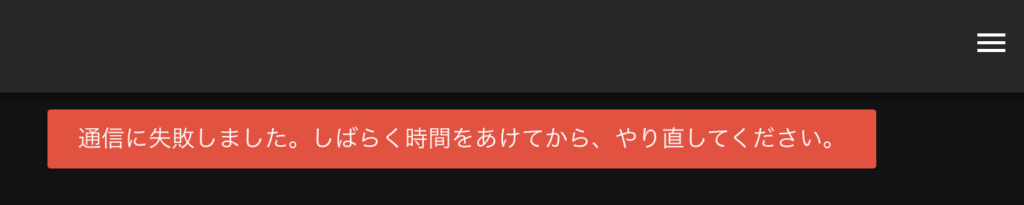
API通信エラー
vee-validate追加
$ yarn add vee-validate
アカウント登録画面
pages/users/sign_up.vue を作成
<template>
  <validation-observer v-slot="{ invalid }" ref="observer">
v-slotのinvalid: 下のv-btnのdisabledで使用。ボタンを押せるか否か。
refのobserver: 下のthis.$refs.observer.setErrorsで使用。
<Message :alert="alert" :notice="notice" />
自作components → https://dev.azure.com/nightonly/nuxt-app-origin/_git/nuxt-app-origin/commit/8d6b7cb6c61470697cc9b5bc4a479aaa84e8b3a2
    <v-card max-width="480px">
      <v-form>
        <v-card-title>
          アカウント登録
        </v-card-title>
        <v-card-text>
          <validation-provider v-slot="{ errors }" name="name" rules="required">
            <v-text-field
              v-model="name"
              label="氏名"
              prepend-icon="mdi-account"
              :error-messages="errors"
            />
          </validation-provider>
v-slotのerrors: error-messagesに渡されて、表示される。
rules: 入力チェック(validate)内容。
          <validation-provider v-slot="{ errors }" name="email" rules="required|email">
            <v-text-field
              v-model="email"
              label="メールアドレス"
              prepend-icon="mdi-email"
              :error-messages="errors"
            />
          </validation-provider>
          <validation-provider v-slot="{ errors }" name="password" rules="required|min:8">
            <v-text-field
              v-model="password"
              type="password"
              label="パスワード [8文字以上]"
              prepend-icon="mdi-lock"
              append-icon="mdi-eye-off"
              :error-messages="errors"
            />
          </validation-provider>
          <validation-provider v-slot="{ errors }" name="password_confirmation" rules="required|confirmed:password">
            <v-text-field
              v-model="password_confirmation"
              type="password"
              label="パスワード(確認)"
              prepend-icon="mdi-lock"
              append-icon="mdi-eye-off"
              :error-messages="errors"
            />
          </validation-provider>
          <v-btn color="primary" :disabled="invalid" @click="signUp">
            登録
          </v-btn>
        </v-card-text>
        <v-card-actions>
          <ul>
            <li>
              <NuxtLink to="/users/sign_in">
                ログイン
              </NuxtLink>
            </li>
          </ul>
        </v-card-actions>
      </v-form>
    </v-card>
  </validation-observer>
</template>

<script>
import { required, email, min, confirmed } from 'vee-validate/dist/rules'
import { extend, ValidationObserver, ValidationProvider, setInteractionMode } from 'vee-validate'
import Message from '~/components/Message.vue'

setInteractionMode('eager')
eager(デフォルト)かlazy
> フォーカスアウト時にバリデーションが走り、エラーの場合は、エラーが消えるまで入力中でも、バリデーションが走る
VeeValidateのバリデーション発火タイミングを変更する方法 | ガクLog
extend('required', {
  ...required,
  message: '入力してください。'
TODO: vee-validateのlocale使うか、vue-i18nを使った方が良さそう。
→ publicRuntimeConfigで環境毎の値を保持とi18n対応
})
extend('email', {
  ...email,
  message: '形式が正しくありません。'
})
extend('min', {
  ...min,
  message: '{length}文字以上で入力してください。'
})
extend('confirmed', {
  ...confirmed,
  message: 'パスワードと一致しません。'
})

export default {
  name: 'UsersSignUp',
> nameプロパティをつける理由は、(1)処理の中でそのデータ(値)を使うから。
> あるいは、(2)デバッグ用として。
【Vue】export defaultのnameについて – Qiita
  components: {
    ValidationObserver,
    ValidationProvider,
    Message
  },

  data () {
    return {
      alert: null,
      notice: null,
      name: '',
      email: '',
      password: '',
      password_confirmation: ''
    }
  },

  created () {
    if (this.$auth.loggedIn) {
      this.$toasted.info('既にログインしています。')
      return this.$router.push({ path: '/' })
    }
「middleware: ‘auth’」でも出来ますが、メッセージ出す為。
toast便利ですね。下記で追加。
$ yarn add @nuxtjs/toast
  },

  methods: {
    async signUp () {
      await this.$axios.post('http://localhost:3000/users/auth/sign_up.json', {
TODO: URLは環境毎に変わるので、cross-envを使った方が良さそう。
→ publicRuntimeConfigで環境毎の値を保持とi18n対応
        name: this.name,
        email: this.email,
        password: this.password,
        password_confirmation: this.password_confirmation,
        confirm_success_url: 'http://localhost:5000/users/sign_in'
      })
        .then((response) => {
          return this.$router.push({ path: '/users/sign_in', query: { alert: response.data.alert, notice: response.data.notice } })
成功時は、パラメータでメッセージ渡して、ログイン画面で表示して貰う。
        },
        (error) => {
          if (error.response == null) {
前回は、(typeof error.response === ‘undefined’)を使っていたけど、これに変更。
===(3つ)にするとfalseになるので、==(2つ)
            this.$toasted.error('通信に失敗しました。しばらく時間をあけてから、やり直してください。')
          } else {
            this.alert = error.response.data.alert
            this.notice = error.response.data.notice
            this.$refs.observer.setErrors(error.response.data.errors)
APIからの入力エラーをsetErrorsで渡してあげるだけで表示される。
observer: 上のvalidation-observerのrefで定義。
          }
          return error
        })
    }
  }
}
</script>
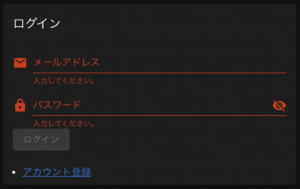
ログイン画面
初期表示
フロントの入力エラー
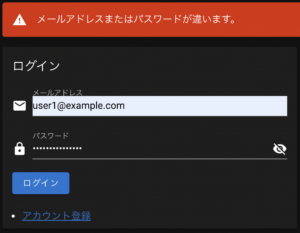
APIからの入力エラー
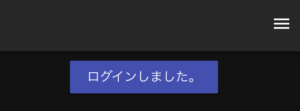
認証成功

“vee-validateで入力チェックした上で、APIからの入力エラーも各項目に表示する” に対して1件のコメントがあります。